Manage administrator access to Citrix Cloud
Administrators are managed from the Citrix Cloud console. Depending on the identity provider you use to authenticate administrators, you can add administrators individually or using groups.
All administrators are required to use tokens as a second factor of authentication when signing in to Citrix Cloud. After you add an administrator, they can enroll their device in multifactor authentication and generate tokens using any app that follows the Time-Based One-Time Password standard, such as Citrix SSO.
Add new administrators
Citrix Cloud supports the following identity providers for authenticating administrators:
- Citrix identity provider: The default identity provider in Citrix Cloud. Supports adding individual administrators only.
- Microsoft Entra ID: Supports adding administrators individually and through ME-ID groups. For more information, see Manage administrator groups.
- SAML 2.0: Supports adding administrators individually and through AD groups. For more information, see Connect SAML as an identity provider to Citrix Cloud
- Google: Supports adding administrators individually and through Google groups. For more information, see Google Cloud Identity
Adding new administrators uses the following workflow:
- Select the identity provider that you want to use for authenticating administrators.
- Depending on the identity provider, invite individual administrators or select the groups that the administrators belong to.
- Specify the access permissions that align with the administrators’ roles in your organization. For more information, see Modify administrator permissions in this article.
Invite individual administrators
Adding individual administrators involves inviting them to join your Citrix Cloud account. When you add an administrator, Citrix sends them an invitation email. Before the administrator can sign in, they must accept the invitation. Administrators that you add through groups don’t receive invitations and can sign in immediately after you add them.
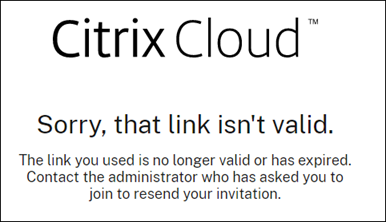
Invitation emails are sent from cloud@citrix.com and explain how to access the account. The invitation is valid for five consecutive days from the day that you send it. After five days have elapsed, the invitation link expires. If the invited administrator uses the expired link, Citrix Cloud displays a message indicating the link is not valid.
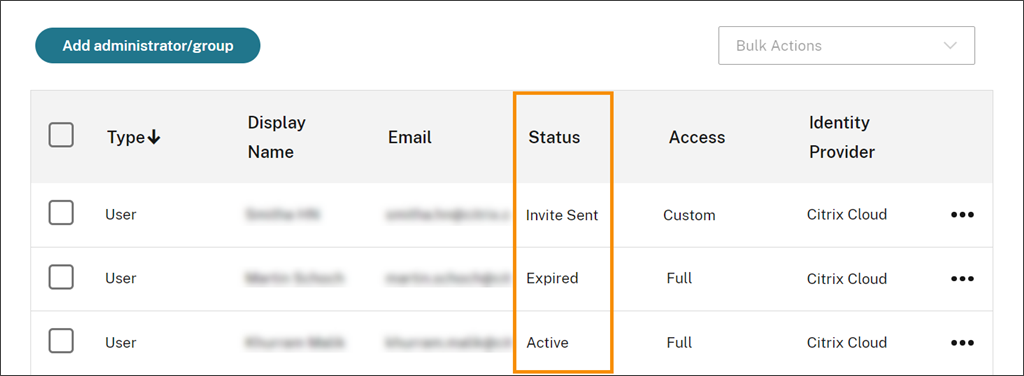
Citrix Cloud also displays the status of the invitation so you can see whether the administrator accepted it and signed in to Citrix Cloud.
Note
Administrator accounts can be associated with up to 100 customer accounts. If an administrator needs to manage more than 100 customer accounts, they must create a separate administrator account with a different email address to manage the additional customers. Alternatively, you can remove the administrator from customer accounts that they no longer need to manage.
To invite an administrator
-
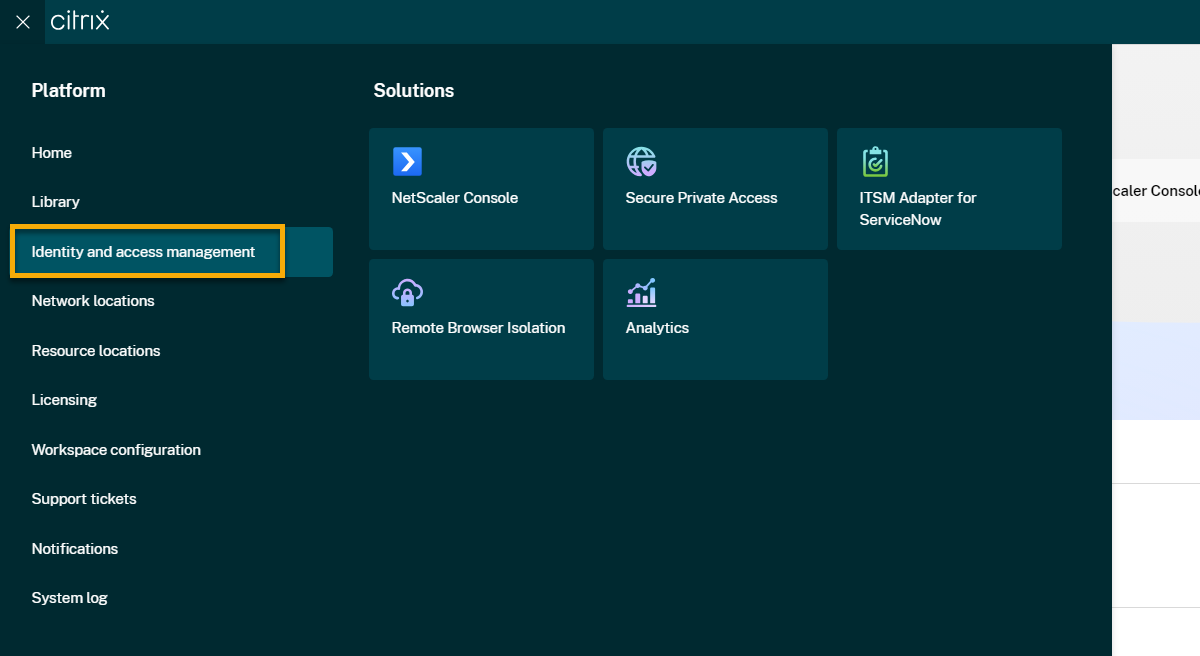
Sign in to Citrix Cloud and then select Identity and Access Management from the menu.
-
On the Identity and Access Management page, select Administrators. The console shows all the current administrators in the account.
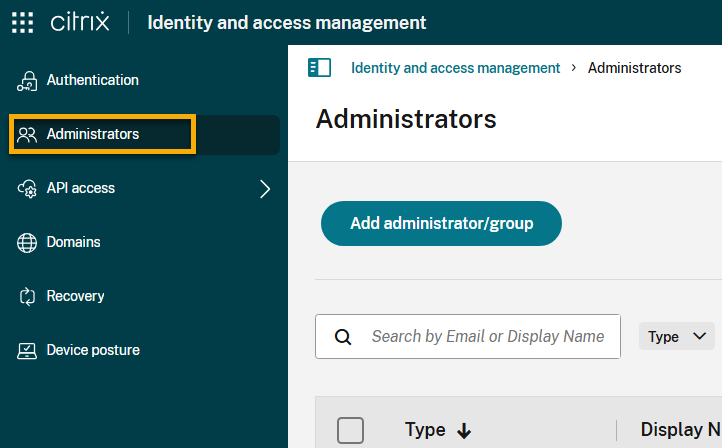
- Select Add administrator/group.
- In Administrator details, select the identity provider you want to use. If using Microsoft Entra ID, Citrix Cloud might prompt you to sign in first.
- If Citrix Identity is selected, enter the user’s email address and then select Next.
- If Microsoft Entra ID is selected, type the name of the user you want to add and then click Next. Inviting ME-ID guest users is not supported.
- In Set access, configure the appropriate permissions for the administrator. Full access (selected by default) allows control of all Citrix Cloud functions and subscribed services. Custom access allows control of the functions and services that you select.
- Review the administrator details. Select Back to make any changes.
- Select Send invitation. Citrix Cloud sends an invitation to the user you specified and adds the administrator to the list.
Resend an invitation
To resend the invitation, select Resend Invite Email from the ellipsis menu at the far-right of the console. Resending an invitation doesn’t affect the five-day time limit before the invitation expires.

Resend an invitation with a new sign-in link
If the original invitation email expires, you can send a new one to the administrator. Perform the following steps:
- Delete the administrator from Citrix Cloud: On the Administrators page, locate the administrator in the list and then select Delete Administrator from the ellipsis menu.
- Wait several minutes to ensure Citrix Cloud completes the deletion. In some cases, inviting the administrator again immediately after deletion could result in sending an invitation with a faulty sign-in link.
- Invite the administrator again as described in To invite an administrator.
Accept an administrator invitation
If you are invited to a Citrix Cloud account, Citrix sends you an email that includes the organization ID and the customer name of the account.
To accept the invitation, click Sign In. Afterwards, a browser window opens. If you don’t already have a Citrix Cloud account, the browser displays a page where you can create your password. If you already have an account, Citrix Cloud prompts you to use your existing password to sign in.
During sign-in, you might be prompted to enroll in multifactor authentication. For enrollment instructions, see Set up multifactor authentication.
Add administrator groups
You can add administrators using AD groups (for SAML authentication), Microsoft Entra ID groups (for Microsoft Entra ID authentication) or Google groups (for Google Authentication). For more information, see Manage administrator groups.
Approve requests to join Citrix Cloud
From time to time, you might receive an approval request from Citrix Cloud on behalf of someone in your organization who would like to join your Citrix Cloud account as an administrator.
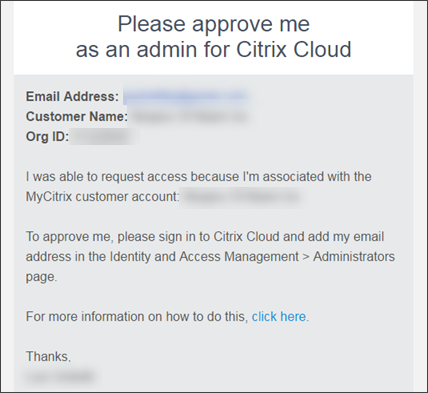
To approve these requests, you invite the person requesting access to be an administrator, as described in Invite individual administrators in this article. You must use the same email address that appears in the approval request email.
After receiving the invitation, the person requesting access clicks the Sign in link to accept the invitation. The person can then create a password for Citrix Cloud and sign in to your account.
For more information about how approval requests are generated, see What happens if the account is already in use?.
Change your email address
You can change your own email address in Citrix Cloud. Your new address must be different from your recovery email address for multifactor authentication (MFA). When changing your email address, Citrix Cloud sends you a verification email to the new address. After verification, Citrix Cloud signs you out so the change can be completed. After a few minutes, you can sign in again with your new email address.
-
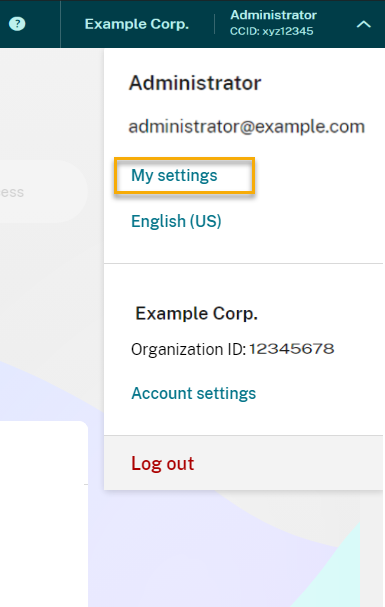
From the top-right menu, select My settings.
- In Email address, select Change email.
- Enter the new email address and then select Send verification email.
- Enter the 6-digit verification code from the email and then select Verify and complete.
- Select Yes, change my email address to confirm the change.
After confirming your changes, Citrix Cloud signs you out. After a few minutes you can sign in again with your new email address.
Modify administrator permissions
When you add administrators to your Citrix Cloud account, you define the administrator permissions that are appropriate for their role in your organization. By default, new administrators are assigned full access permissions to all Citrix Cloud account functions and available services. If you want to limit access to certain areas of the management console or specific services, you can define custom access permissions.
Only Citrix Cloud administrators with full access can define permissions for other administrators.
To change existing administrator permissions:
- Sign in to Citrix Cloud at https://citrix.cloud.com.
- From the Citrix Cloud menu, select Identity and Access Management and then select Administrators.
- Select the identity provider you want to manage: Citrix Identity (default), Active Directory (if using SAML as your identity provider) or Microsoft Entra ID (if connected).
-
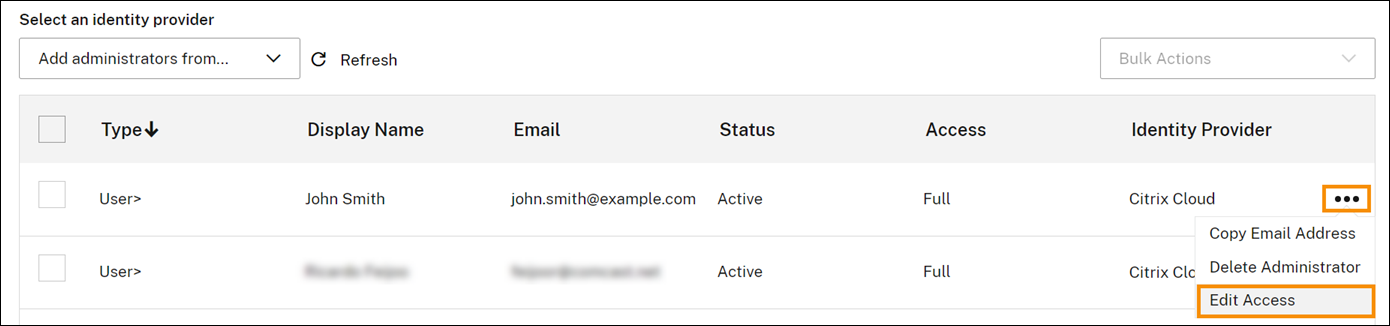
Locate the administrator or group you want to manage, click the ellipsis button, and select Edit access.
- To allow or disallow specific permissions, select Custom access. To allow access to all Citrix Cloud functions, select Full access.
- To locate service permissions quickly, start typing in the search box. Citrix Cloud displays matching permissions as you type. For example, if you start typing “read only,” permissions with “read only” in the title are displayed. Searching permissions is case-insensitive.
-
To define custom access permissions for the Citrix Cloud management console, expand General.
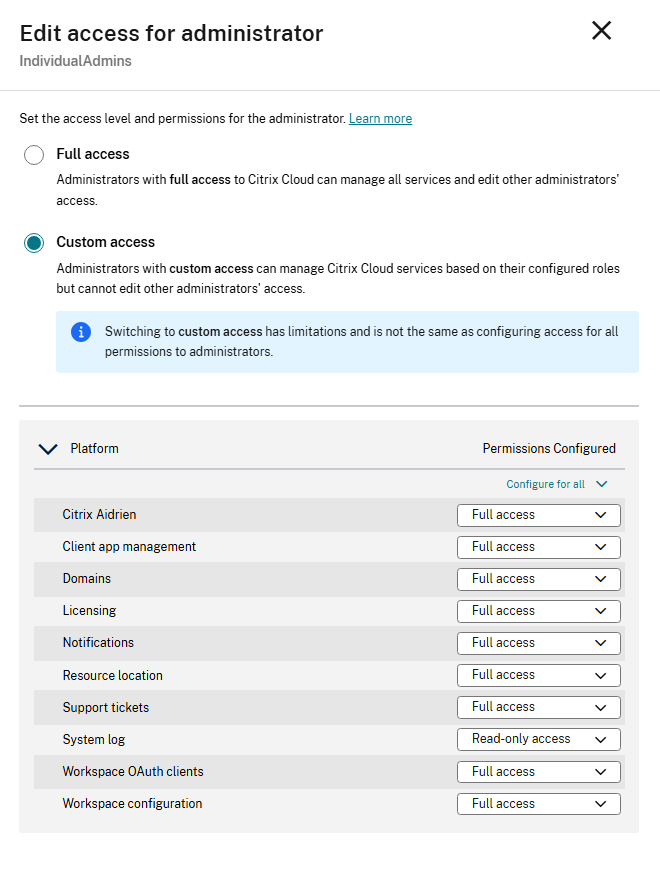
- To define custom access permissions for a specific service, expand the service.
- For each permission, select or clear the check mark as needed.
- Select Save.
Console permissions
This section describes the custom access permissions that are available for the Citrix Cloud management console. For more information about the custom access permissions for a specific service, consult the service’s documentation. Most platform roles support Read-Only access, but some roles are limited to either Read-only or Full Access only (see below):
- Customer Dashboard: For Citrix Service Providers (CSPs) only. Grants view access to the Customer Dashboard. (Read-Only only)
- Domains: Grants access to the Identity and Access Management > Domains tab. Administrators can add an Active Directory domain by downloading the Citrix Cloud Connector™ software from this tab and installing it on a server in the domain.
- Licensing: Grants access to the Cloud Services and Licensed Deployments tabs of the Licensing console page. (Read-Only only)
- Notifications: Grants access to the Notifications console page. Administrators can view and dismiss Citrix Cloud notifications.
-
Resource Locations: Grants access to the Resource Locations console page. Administrators can add new resource locations and add FAS servers for single sign-on. They can also manage connector updates.
- Secure Client: Grants access to the Identity and Access Management > API Access > Secure Clients tab. Administrators can create and manage their own secure clients for use with Citrix Cloud APIs. This permission doesn’t include access to the Identity and Access Management > API Access > Product Registrations tab. Only full access administrators can access the Product Registrations tab.
- Support Tickets: Grants access to the Support Tickets console menu option and the Open a Ticket Help menu option. Selecting either of these options sends the administrator to the My Support portal. For more information, see Technical Support. (Full-Access only)
- System Log: Grants access to the System Log console page. Administrators can view system log events and export events to a CSV file.(Read-Only only)
- StoreFront Cloud: Grants access to the StoreFront Cloud console page. Administrators can change authentication methods, customize store appearance and behavior, enable and disable services, and configure site aggregation. For more information, see the Citrix® StoreFront Cloud product documentation. (Full-Access only)
- Store OAuth Clients (preview): Grants access to the Identity and Access Management > API Access > store API tab. Administrators can create and manage their own OAuth client to interact with Citrix® StoreFront Cloud platform APIs. OAuth clients are used exclusively for store APIs and include the option to create private clients that expire automatically.
Note:
It is recommended to assign the Store OAuth clients custom role with caution. The access privileges associated with this role might enable administrators to access end users’ resources (VDAs or applications) on the store platform. It is also important to note that administrators with Full access will automatically have access permissions equivalent to that of an administrator with the Store OAuth clients permission.
Manage your primary MFA method
To sign in to Citrix Cloud with multifactor authentication (MFA), you can use an authenticator app or you can use your email address. This section describes how to change your device enrollment for MFA or switch to a different MFA method.
Change your device for MFA
If you lose your enrolled device, want to use a different device with Citrix Cloud, or reset your authenticator app, you can re-enroll in Citrix Cloud MFA.
Notes
- Changing your device deletes the current device enrollment and generates a new authenticator app key.
- If you are re-enrolling with the same authenticator app from your original enrollment, delete the Citrix Cloud entry from your authenticator app before you re-enroll. The codes displayed in this entry will no longer work after you complete re-enrollment. If you don’t delete this entry before or after re-enrollment, your authenticator app displays two Citrix Cloud entries with differing codes which can cause confusion when signing in to Citrix Cloud.
- If you are re-enrolling with a new device and don’t have an authenticator app, download and install one from your device’s app store. For a smoother experience, Citrix recommends installing an authenticator app before you re-enroll your device.
-
Sign in to Citrix Cloud and enter the code from your authenticator app.
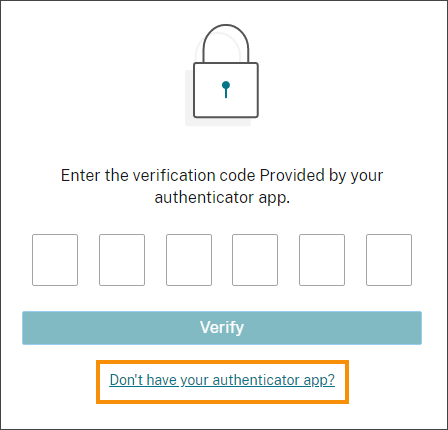
If you don’t have your authenticator app, click Don’t have your authenticator app? and select a recovery method to help you sign in. Depending on the recovery method selected, enter the recovery code you received or an unused backup code and select Verify.
- If you are an administrator for multiple customer organizations, select any customer organization.
-
From the top-right menu, select My settings.
-
In Authenticator app, select Add new device.

- When prompted to confirm changing your device, select Yes, change my device.
- Verify your identity by entering a verification code from your authenticator app. If you don’t have an authenticator app, select Use a recovery method to verify your identity with the recovery method of your choice. Depending on the recovery method you select, enter the verification code or recovery code you receive or an unused backup code. Select Verify and continue.
- If you are using the device you originally enrolled and your original authenticator app, delete the existing Citrix Cloud entry from your authenticator app.
- If you are enrolling a new device and don’t have an authenticator app, download one from your device’s app store.
- From your authenticator app, scan the QR code with your device or enter the key manually.
- Enter the 6-digit verification code from your authenticator app and select Verify code.
After you change your device, Citrix strongly recommends checking that the verification methods in your My Profile page are up-to-date.
Change your MFA method
If you enrolled in MFA using an authenticator app and you want to switch to using your email address, be aware that changing your authentication method deletes your device enrollment. If you want to go back to using an authenticator app for MFA, you’ll need to re-enroll your device.
- From the top-right menu of the Citrix Cloud console, select My settings.
- Under Multifactor Authentication (MFA), select the authentication method you want to switch to.
- If switching to email MFA:
- Select Yes, change to email to confirm you want to change your MFA method.
- Enter the code from your authenticator app or use a recovery method to confirm your identity.
- Select Verify and continue to complete the change.
- If switching to an authenticator app:
- When prompted, enter the verification code that Citrix Cloud sends to your email address and select Verify and continue. Alternatively, use a recovery method to confirm your identity.
- Using your authenticator app, scan the QR code with your device’s camera or enter the alphanumeric key.
- Under Verify your authenticator app, enter the 6-digit code from your authenticator app.
- Click Verify code to complete the device enrollment.
Manage your MFA recovery methods
Important:
To ensure your Citrix Cloud account remains secure, keep your verification methods up-to-date with accurate information. If you lose access to your authenticator app or MFA email address, these verification methods are the only way you can recover access to your account.
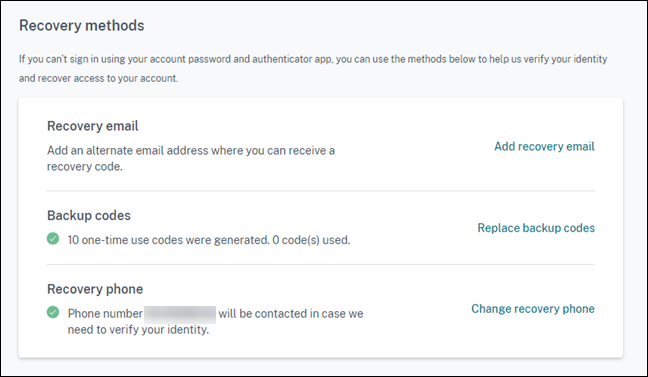
Add or change your recovery email
- From the top-right menu, select My settings.
- Under Recovery methods, in Recovery email, select Add recovery email if you haven’t yet added a recovery email address. If you’ve already added a recovery email address, select Change recovery email.
- When prompted, enter the verification code from your authenticator app or the code sent to your email address.
- Enter the new email address you want to use and then select Send verification email. This email address must be different from the email address you use for your Citrix Cloud account. Citrix Cloud sends you a verification email to the email address you entered.
- Enter the code from the verification email and then click Verify code and complete.
Generate new backup codes
You can generate a new set of backup codes at any time. When you use backup codes, Citrix Cloud records the number that have been used in your My Profile page.
After you generate new backup codes, be sure to store them in a safe place.
- From the top-right menu, select My settings.
- Under Recovery methods, in Backup codes, select Generate new backup codes if you haven’t generated backup codes before. If you previously generated backup codes, select Replace backup codes.
- When prompted to replace your backup codes, select Yes, replace my codes.
- Verify your identity by entering a verification code from your authenticator app or the code sent to your email address.
- Select Verify and continue. Citrix Cloud generates and displays a new set of backup codes.
- Select Download codes to download your new codes as a text file. Then, select I’ve stored my backup codes.
- Select I’ve stored my backup codes to finish replacing your backup codes.
Change your recovery phone number
- From the top-right menu, select My settings.
- Under Recovery methods, in Recovery phone, select Change recovery phone.
- Enter the verification code from your authenticator app or the code sent to your email address. Select Verify and continue.
- Enter the new phone number you want to use. Then, re-enter the phone number to confirm.
- Select Save recovery phone number.
Note:
You can modify the permissions of Citrix Endpoint Management™ (CEM) administrators only after the administrator has accepted an administrator invitation and clicked Manage on the CEM tile. Like all Citrix Cloud administrators, CEM administrators have Full access by default.