-
-
Cloud Connector Standalone Citrix Secure Ticketing Authority (STA) service
-
-
Citrix snipping tool
-
-
-
-
This content has been machine translated dynamically.
Dieser Inhalt ist eine maschinelle Übersetzung, die dynamisch erstellt wurde. (Haftungsausschluss)
Cet article a été traduit automatiquement de manière dynamique. (Clause de non responsabilité)
Este artículo lo ha traducido una máquina de forma dinámica. (Aviso legal)
此内容已经过机器动态翻译。 放弃
このコンテンツは動的に機械翻訳されています。免責事項
이 콘텐츠는 동적으로 기계 번역되었습니다. 책임 부인
Este texto foi traduzido automaticamente. (Aviso legal)
Questo contenuto è stato tradotto dinamicamente con traduzione automatica.(Esclusione di responsabilità))
This article has been machine translated.
Dieser Artikel wurde maschinell übersetzt. (Haftungsausschluss)
Ce article a été traduit automatiquement. (Clause de non responsabilité)
Este artículo ha sido traducido automáticamente. (Aviso legal)
この記事は機械翻訳されています.免責事項
이 기사는 기계 번역되었습니다.책임 부인
Este artigo foi traduzido automaticamente.(Aviso legal)
这篇文章已经过机器翻译.放弃
Questo articolo è stato tradotto automaticamente.(Esclusione di responsabilità))
Translation failed!
Citrix snipping tool integration in Assistant
Overview
The Citrix Snipping Tool allows users to seamlessly capture screenshots of overlay and redirected content within their Citrix Virtual Apps and Desktops sessions.
Traditionally, native in-session screenshot tools cannot capture content that is optimized or offloaded to the client endpoint. Because this media is rendered locally rather than on the server (VDA), optimized elements—such as Microsoft Teams video or Browser Content Redirection (BCR) windows—typically appear as solid black boxes or placeholder graphics in standard screenshots.
The Citrix Snipping Tool bridges this gap by enabling in-session screenshotting of all redirected content. This ensures complete and accurate captures for documentation, troubleshooting, and collaboration, capturing the session exactly as the user sees it.
Supported Content
The Citrix Snipping Tool successfully captures content optimized by the following features:
-
Browser Content Redirection (BCR): Captures offloaded web rendering. For details on the feature, see Browser Content Redirection documentation
-
HTML5 Multimedia Redirection: Captures optimized HTML5 video elements. For details on the feature, see HTML5 Multimedia Redirection documentation
-
Windows Media Redirection: Captures redirected Windows media playback. For details on the feature, see Windows Media redirection documentation
-
Unified Communications (UC) Optimizations: Captures overlay video and UI elements for HDX WebRTC / UCSDK optimized applications (such as Microsoft Teams VDI 1.0, Amazon Connect, Five9, Ring Central) and third-party optimized applications (such as Microsoft Teams VDI 2.0 (SlimCore), Zoom, and Webex)
System Requirements
-
Virtual Delivery Agent (VDA): Version 2603 or later.
-
Citrix Workspace app: Citrix Workspace app for Windows version 2603 or later.
-
Supported Endpoint Operating Systems: Windows only. (Note: macOS, Linux, and ChromeOS are not currently supported).
Configuration
The Citrix Snipping Tool is controlled via Citrix policies. By default, the ability to capture redirected content is enabled.
To configure the policy:
-
Open Citrix Studio (or Web Studio) and navigate to Policies.
-
Locate Screenshot Redirected Content policy setting.
-
Select Enabled to allow users to capture overlay content or select Disabled if your environment has strict security requirements that prohibit screen captures.
Note:
Citrix Snipping Tool respects existing security boundaries. If Citrix App Protection is active, the tool will automatically disable the capture of redirected content to prevent data leakage. For more information, see the App Protection documentation.
Usage
To capture in-session screenshots that include optimized or redirected overlay content, follow these steps:
-
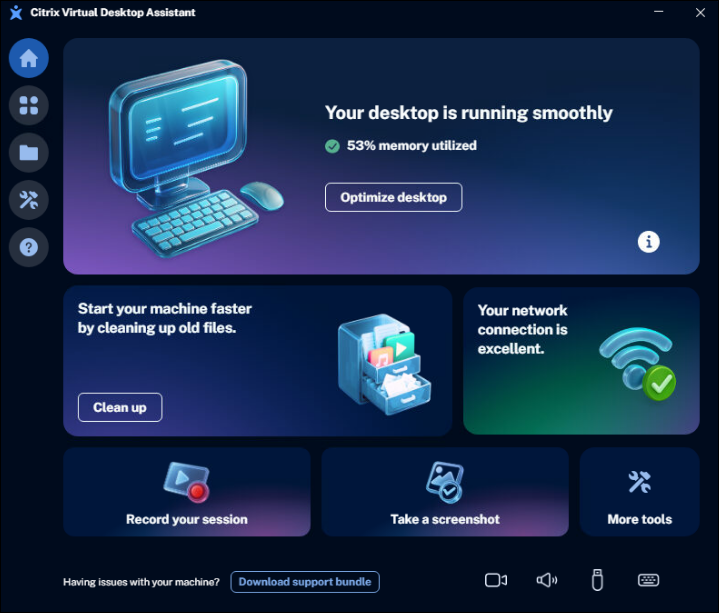
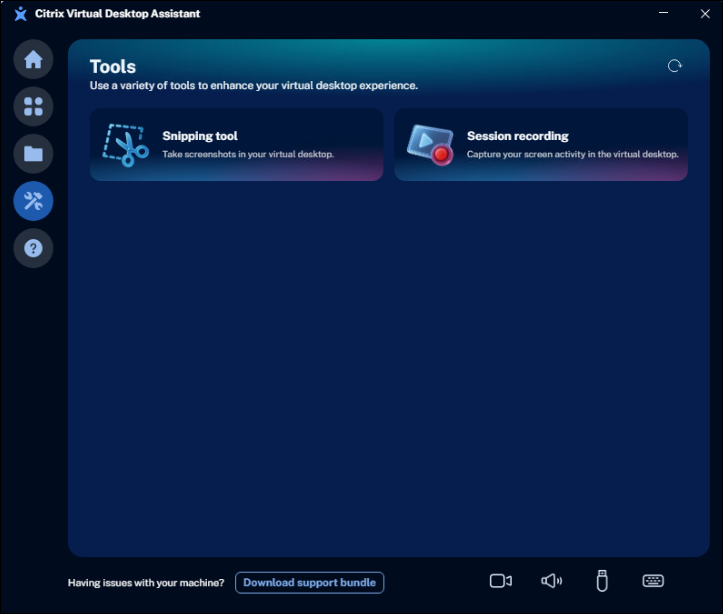
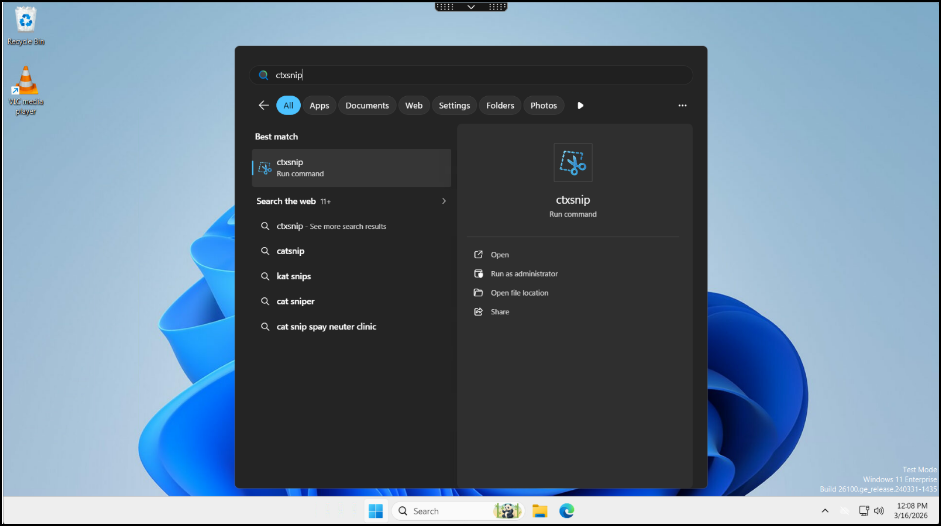
Citrix recommends launching the Citrix Snipping Tool directly from Citrix Assistant (from More tools in Home page). For more information on the application, see Citrix Assistant documentation. (Alternatively, you can open the Windows Start menu within your virtual desktop session to launch the Citrix Snipping Tool)
-
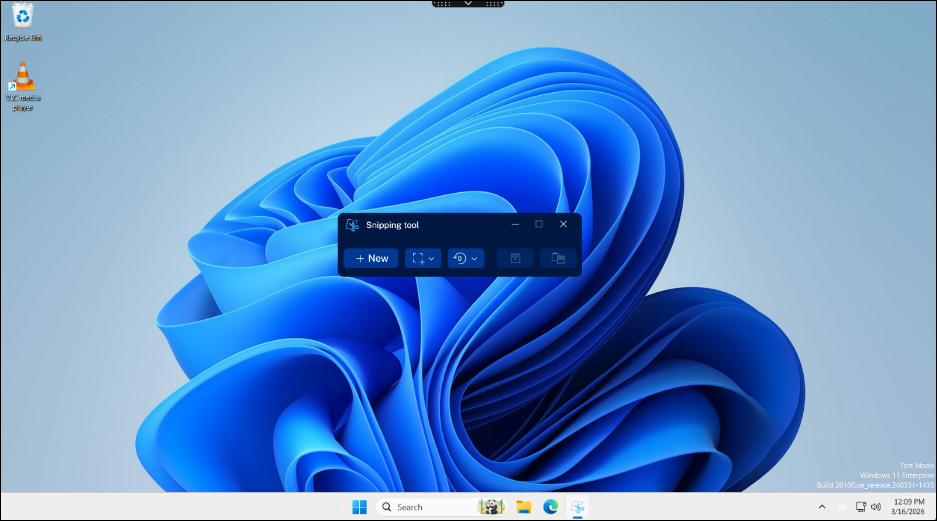
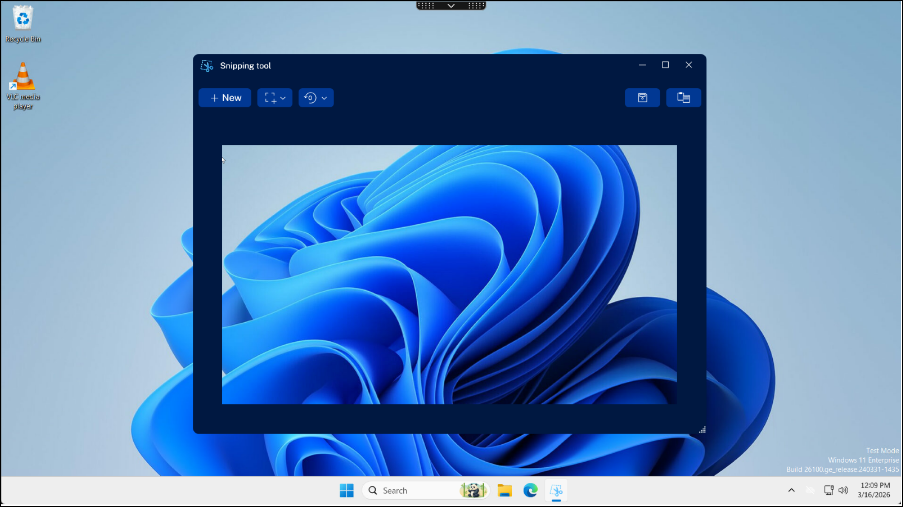
Click the New button to begin a capture.
-
Click and drag your cursor to select the specific area of the screen you want to capture. Once the screenshot is captured, you can copy the image directly to your clipboard, or save it as a .PNG or .BMP file.
Additional options
The Citrix Snipping Tool includes additional settings to customize your screenshots:
-
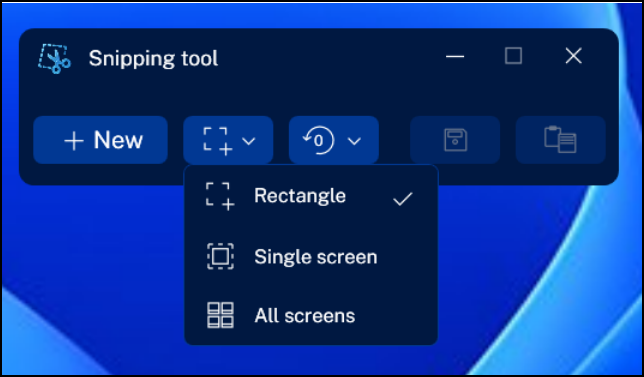
Snipping Area: By default, the tool captures a custom, user-defined region of the screen. You can change this mode to capture a full-screen screenshot of the entire session. If you are using a multi-monitor setup, the full-screen mode will capture all active screens.
-
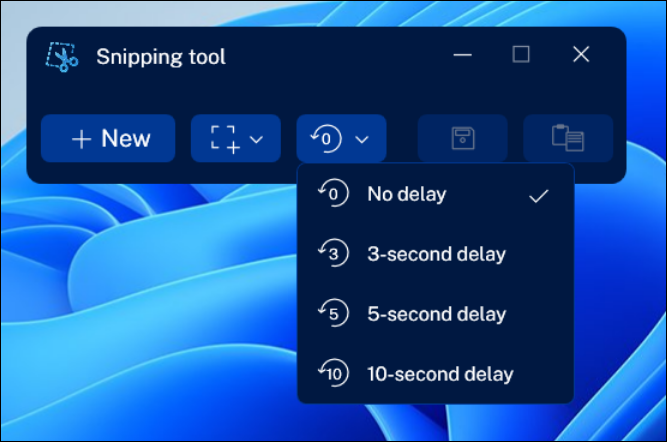
Delay Timer: To capture temporary on-screen elements (such as drop-down menus or hover states), use the Delay button to select a countdown timer. The tool will wait for the specified duration before freezing the screen and capturing the snip.
Troubleshooting
Overlay content is not captured
-
Verify that the Screenshot Redirected Content policy is set to Enabled in Citrix Studio.
-
Ensure that both your Virtual Delivery Agent (VDA) and Citrix Workspace app meet the minimum version requirements (2603 or later).
-
Check if App Protection or other anti-screen capture security policies are active. If these security boundaries are enabled, they will intentionally block the tool’s functionality to prevent data leakage.
Black bars or placeholder messages persist in screenshots
- Verify that you are actively using the Citrix Snipping Tool to capture the screen. Native OS screenshot utilities (such as the default Windows Snipping Tool) and third-party capture applications cannot intercept optimized overlay content and will still result in black boxes.
The Citrix Snipping Tool is unavailable or missing
- Ensure that your Virtual Delivery Agent (VDA) is updated to version 2603 or later. The application will not be present or supported on older VDA releases.
Share
Share
This Preview product documentation is Citrix Confidential.
You agree to hold this documentation confidential pursuant to the terms of your Citrix Beta/Tech Preview Agreement.
The development, release and timing of any features or functionality described in the Preview documentation remains at our sole discretion and are subject to change without notice or consultation.
The documentation is for informational purposes only and is not a commitment, promise or legal obligation to deliver any material, code or functionality and should not be relied upon in making Citrix product purchase decisions.
If you do not agree, select I DO NOT AGREE to exit.