-
-
Cloud Connector Standalone Citrix Secure Ticketing Authority (STA) service
-
-
-
-
-
This content has been machine translated dynamically.
Dieser Inhalt ist eine maschinelle Übersetzung, die dynamisch erstellt wurde. (Haftungsausschluss)
Cet article a été traduit automatiquement de manière dynamique. (Clause de non responsabilité)
Este artículo lo ha traducido una máquina de forma dinámica. (Aviso legal)
此内容已经过机器动态翻译。 放弃
このコンテンツは動的に機械翻訳されています。免責事項
이 콘텐츠는 동적으로 기계 번역되었습니다. 책임 부인
Este texto foi traduzido automaticamente. (Aviso legal)
Questo contenuto è stato tradotto dinamicamente con traduzione automatica.(Esclusione di responsabilità))
This article has been machine translated.
Dieser Artikel wurde maschinell übersetzt. (Haftungsausschluss)
Ce article a été traduit automatiquement. (Clause de non responsabilité)
Este artículo ha sido traducido automáticamente. (Aviso legal)
この記事は機械翻訳されています.免責事項
이 기사는 기계 번역되었습니다.책임 부인
Este artigo foi traduzido automaticamente.(Aviso legal)
这篇文章已经过机器翻译.放弃
Questo articolo è stato tradotto automaticamente.(Esclusione di responsabilità))
Translation failed!
Citrix Virtual Desktop Assistant application
Citrix Virtual Desktop Assistant app is a GUI tool designed to enable end-users to optimize their sessions across CPU, memory, networking, HDX™, and other performance factors. It offers a simple and convenient experience, often requiring just a single click to significantly improve session performance or do the troubleshooting.
Sessions can currently be optimized in the following areas:
- System Resources: CPU and memory optimization.
- Network: Network status checks and personalized recommendations.
- Applications: Display unresponsive applications and option to terminate them.
- Storage: Clean temporary files and identify files larger than 100 MB for deletion directly from the user interface.
-
Hardware diagnostics and troubleshooting:
- Audio diagnostic and troubleshooting.
- Camera device testing.
- Keyboard diagnostic
- USB diagnostic
You can also use Always On Tracing (AOT) feature if there are issues with the VDA.
Installation and execution
For Workstation and Server VDA: The Citrix Virtual Desktop Assistant app is downloaded by default and runs in minimal operation mode. After installation, restart the VDA to display the Citrix Virtual Desktop Assistant app icon in the system tray. Then, click the Citrix Virtual Desktop Assistant app icon in the system tray to launch the graphical user interface (GUI).
You can disable the application through the Citrix Virtual Desktop Assistant Studio Policy Setting. When disabled, the icon is removed from the system tray and users cannot launch the application. To do this:
- From Studio, go to Policies.
- Right-click the Assistant app, and select Edit Setting and click Disabled.
Log files
The log files for the Citrix Virtual Desktop Assistant app are stored in USERPROFILE%\AppData\Local\Temp\citrix\AssistantApp\ctxasst.log. Use the log file for troubleshooting.
You can attach these logs manually and email to CitrixVDAssistantFeedback@citrix.com to help us improve the Citrix Virtual Desktop Assistant application.
Explore the UI
The app automatically detects your operating system’s language variant and displays the app in that language.
The app features three main pages, accessible through the left pane:
- Home
- Apps
- Files
- Tools
- About
Camera, Sound, Keyboard, and USB settings are available in the bottom-right corner.
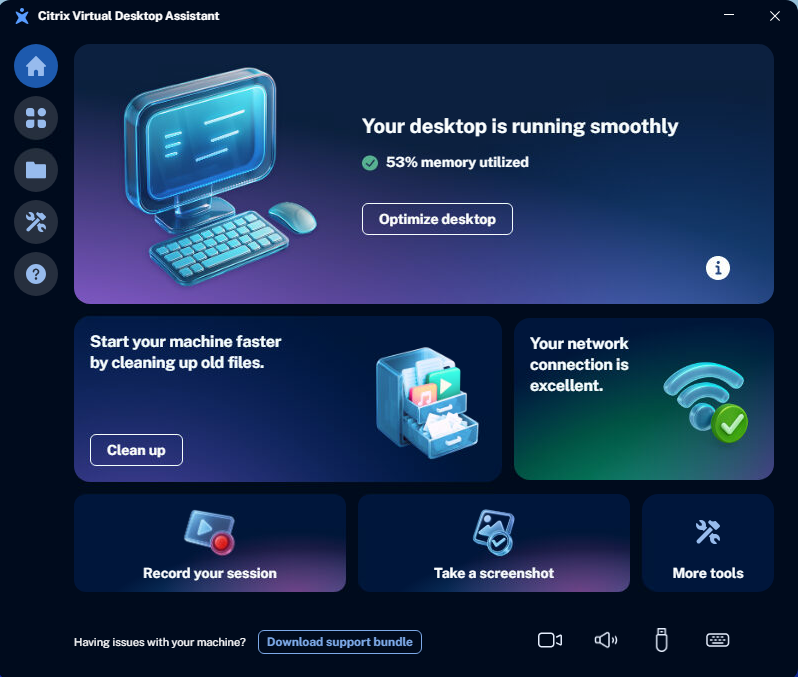
Home page
The Home page provides the following functionalities:
-
Optimize Desktop: The Optimize feature enhances overall system performance by adjusting CPU priority for resource-intensive applications during periods of high CPU usage. It also reclaims memory from inactive applications to ensure efficient use of system resources. After you click Optimize Desktop, you might notice improved system performance, and the applications that have been optimized through memory reclamation.
-
Network Status: This tile displays VDA network connection status. The network connection result is displayed, based on bandwidth and latency data. The connection status is categorized as excellent, fair, or poor. If the status is fair or poor, clicking What can I do? provides recommendations for improvement.
Note:
The option to clean up files is unavailable when the connection is poor.
- Clean Up: This option provides information about your user profile and helps in cleaning up temporary or large files (larger than 100 MB). This action can significantly improve your machine’s log-on time. Temporary files include crashed dump reports, application caches, and hidden files that contribute to a bulky profile. You can also access the Files page on the left pane to clean up files. For more information, see Files page.
- Record your session: This option helps you to record your active virtual desktop session as MP4 video clips for troubleshooting, collaboration and session review. For information, see Tools page.
- Take a screenshot: This option helps you to capture your entire session, including areas that Windows Snipping tool might miss or black out. For information, see Tools page.
- More tools: This option takes you to the Tools page where you get a variety of tools to enhance your virtual desktop experience. For information, see Tools page.
Apps page
The Apps page displays all the unresponsive applications within the VDA session and options to terminate them. You can terminate single or multiple applications from this interface. You also see the Optimized tag beside the application name if that application is in the optimized list.
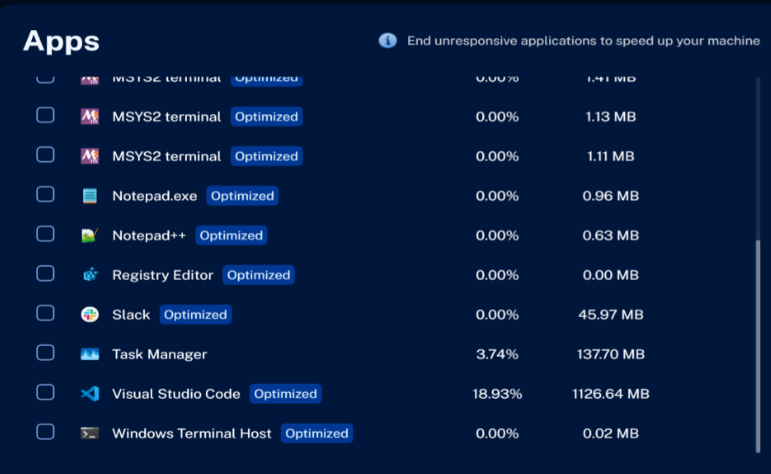
- Terminate a single app: You can either hover over an app row to display the End button or select a check box and click End selected apps. Confirm the action when prompted.
- Terminate multiple apps: Select multiple applications at a time and click End selected apps. Confirm the action when prompted.

Files page
The Files page provides information about your user profile and helps in cleaning up temporary or large files (larger than 100 MB). This action can significantly improve your machine’s log-on time. Temporary files include crashed dump reports, application caches, and hidden files that contribute to a bulky profile.

- Temporary files: Click Clean up to clean temporary files.
- Large files: You can either click Delete to remove the large files or click Open file location to go to their location and then decide on the appropriate action. You can use Ctrl key to select multiple files simultaneously.
- Downloads and Trash folder: Click Open to go to their location and then decide on the appropriate action.
For container-type profile, you can also see capacity usage.
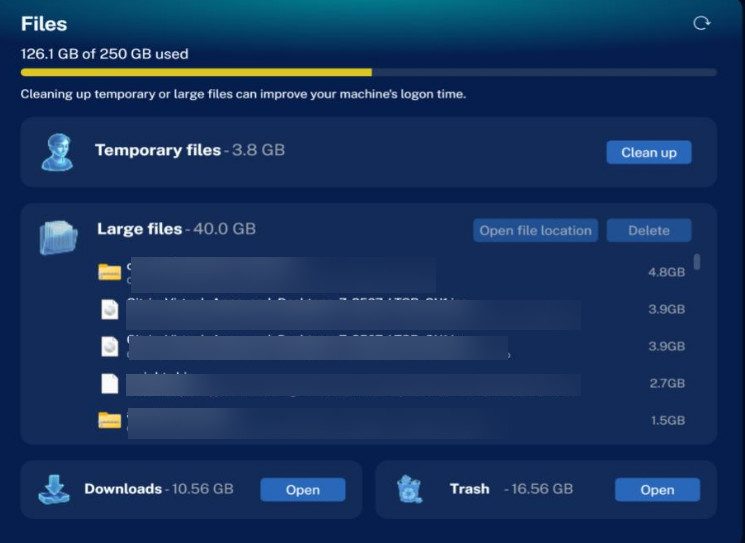
To recalculate the data on the Files page, click the Refresh icon in the top-right corner of the app.
Tools page
The Tools page displays the following tools to enhance your virtual desktop experience.
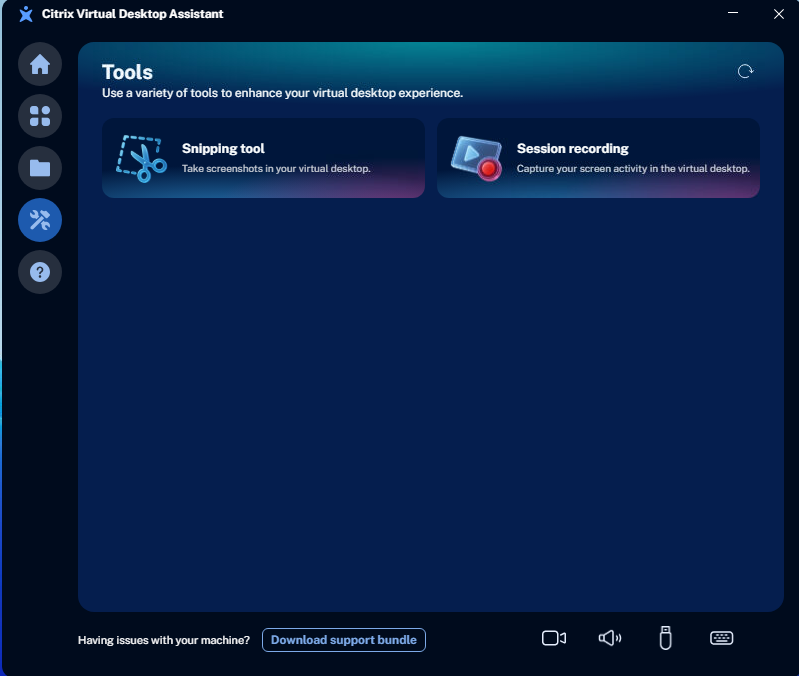
-
Snipping tool: The Citrix Snipping Tool allows users to seamlessly capture screenshots of overlay and redirected content within their Citrix Virtual Apps and Desktops sessions. This includes optimized media such as Browser Content Redirection (BCR), Microsoft Teams Optimization, and other Unified Communications platforms. For more information, see the Citrix Snipping Tool documentation
To capture in-session screenshots:
- Click Snipping tool.
- Click New to start a new snip and select the area you want to capture.
- Once the snip has been captured, save the snip to file in a
.PNGor.BMPfile format, or save to the clipboard.
Note:
- By default, the snipping tool can capture a user-defined region of the VDA session. Alternatively, the snipping tool can also be used to capture a full in-session screenshot of the entire screen (Single screen), or when multiple screens are used (All screens).
- The snipping tool can also be used with a delayed screenshot. Use the delay button to select the desired delay. After the set delay time is over, the screenshot is taken.
If overlay content is not captured, then check the following:
- Confirm the Screenshot Redirected Content policy is enabled in Web Studio.
-
Ensure VDA and Citrix Workspace App versions meet minimum requirements.
- VDA: 2603 or later
- Citrix Workspace App (CWA) for Windows : 2603 or later
- Supported Clients: Windows only
- Check if App Protection is blocking screenshot functionality.
-
Session recording: Records your active virtual desktop session as MP4 video clips for troubleshooting, collaboration and session review.
On the Session recording page, you can manage the capture using the following options:
- Start recording: Begins capturing the current desktop session. A recording indicator is displayed to confirm that the recording is currently in progress.
- Stop recording: Ends the capture and automatically saves the video as an MP4 file.
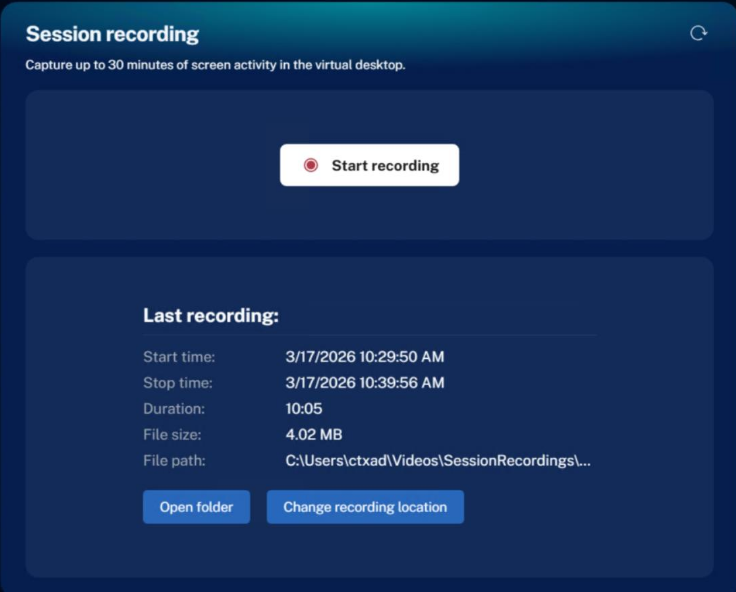
The Session recording page provides the following options to manage captured content:
-
Open folder: Opens the configured directory where the recorded MP4 files are stored. By default, recordings are saved to:
%userprofile%\Videos\SessionRecordings. -
Change recording location: Allows you to modify the storage path for session recordings. Supported locations include:
- Local Storage: Folders on the virtual machine’s local drives.
- Network Paths: Accessible mapped network drives or UNC paths (for example,
\\Server\Share\Recordings), provided you have write permissions.
Sound page
The Citrix Virtual Desktop Assistant app’s sound page helps to diagnose and troubleshoot audio settings within a VDA session.

-
You can select a Microphone and Speaker from the dropdown list if you have multiple audio devices connected.
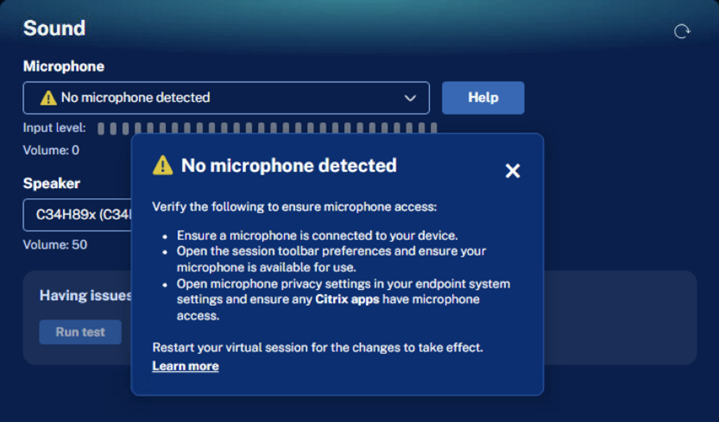
If Citrix Virtual Desktop Assistant cannot use your microphone, you might see one of the following warning messages:
-
No microphone detected: It is most likely caused by microphone privacy settings being disabled for the the Citrix Workspace app. Check your microphone privacy settings and enable access for the Citrix Workspace app, following the tips shown in the dialog.
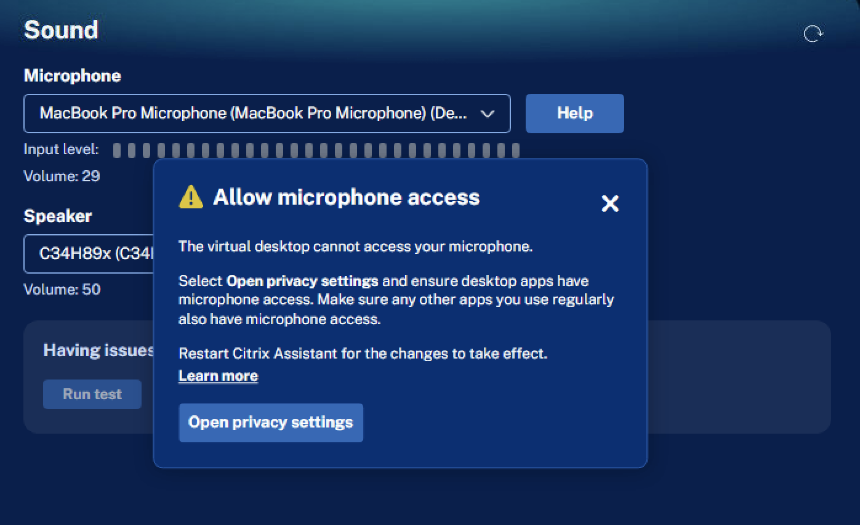
-
Allow microphone access: It happens when Citrix Virtual Desktop Assistant does not have microphone access in the current Citrix virtual desktop. Resolve this issue by following the tips shown in the dialog.
-
- Click Test speaker to test the selected speaker device by playing a demo audio.
- When troubleshooting audio device issues within a VDA session, click Run test and then the application records the sound input. This recording is then exported into a zip file. You can share the zip file with your IT or Citrix Admin team for assistance. You can also replay the audio to verify sound playback.

Camera page
The Citrix Virtual Desktop Assistant app’s camera page helps to configure video settings within a VDA session.

-
You can select a camera from the dropdown list if you have multiple cameras connected.
Note:
If only Citrix HDX Web Camera is displayed and you have multiple camera devices connected on the CWA client, then reboot the VDA machine to see the list of all connected camera devices. Make sure to reboot only after you install the Citrix Virtual Desktop Assistant App.
- You can blur your background. To blur your background, navigate to Citrix Workspace™ app > Preferences > Default webcam > Enable background blur.
- To adjust your camera settings, click Retry Camera. However, make sure that the camera is not in use by other video conferencing tools.
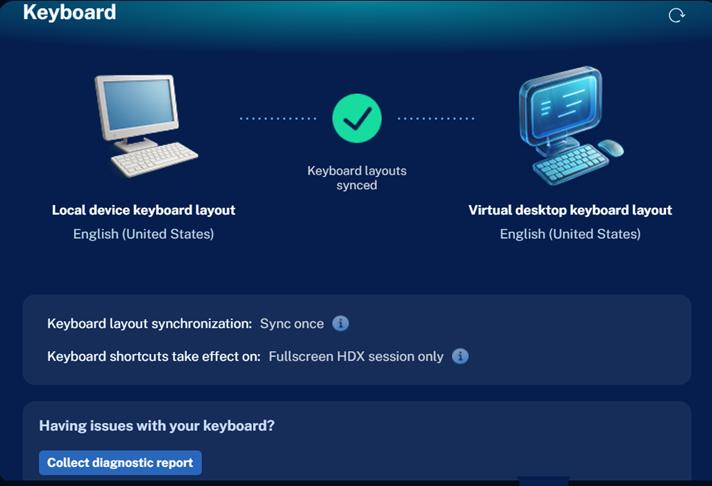
Keyboard page
The Keyboard page displays your local device keyboard layout, Virtual desktop keyboard layout, sync setting, and keyboard shortcut settings in a single view. You can update these settings from your Citrix Workspace app (CWA) preferences toolbar, and the changes reflect in your Assistant app.
For troubleshooting keyboard or IME issues within a VDA session, click Collect Diagnostic Report at the bottom of the page.
Note:
Hover over the info icon to learn about the keyboard setting values.
USB page
The USB page lets you view your USB devices.

If you don’t see the USB screen in Citrix Assistant, ensure the following:
- Your Citrix Workspace app (CWA) version is 2511 or later.
- The USB Redirection Policy is disabled.
-
The following checkboxes are selected in your Preferences toolbar.

USB devices can have five different status values:
- Connected: These devices have redirected successfully, use a virtual channel, and are available for use on both your client and VDA.
- Connected with info: These USB devices have been redirected successfully and are available for use on the VDA. You can disable them by accessing the Devices toolbar from the Citrix Workspace app (CWA) toolbar.
- Driver missing: These devices require a driver to be installed on the VDA, and that driver is currently missing.
- Blocked: These devices are blocked by your administrator through device rules. To use these devices, contact your administrator.
- Available: Enable these devices from the Devices toolbar. Once enabled, they connect and become ready for use on the VDA.
For troubleshooting USB issues within a VDA session, click Collect Diagnostic Report at the bottom of the page.
AOT logs
If your administrator has setup the Always On Tracing (AOT) feature and you are facing issues on your VDA, click Download support bundle to export logs for your session and share the logs with your administrator. The logs also capture the software versions of your Citrix software for the administrator or support to isolate issues based on versions.

About page
From the left pane, right-click the About icon to open the About page.
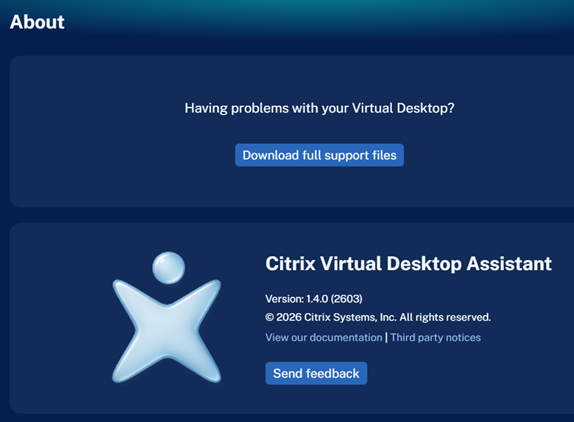
The version information and the third-party license entry of the Citrix Virtual Desktop Assistant app are displayed on the About page.
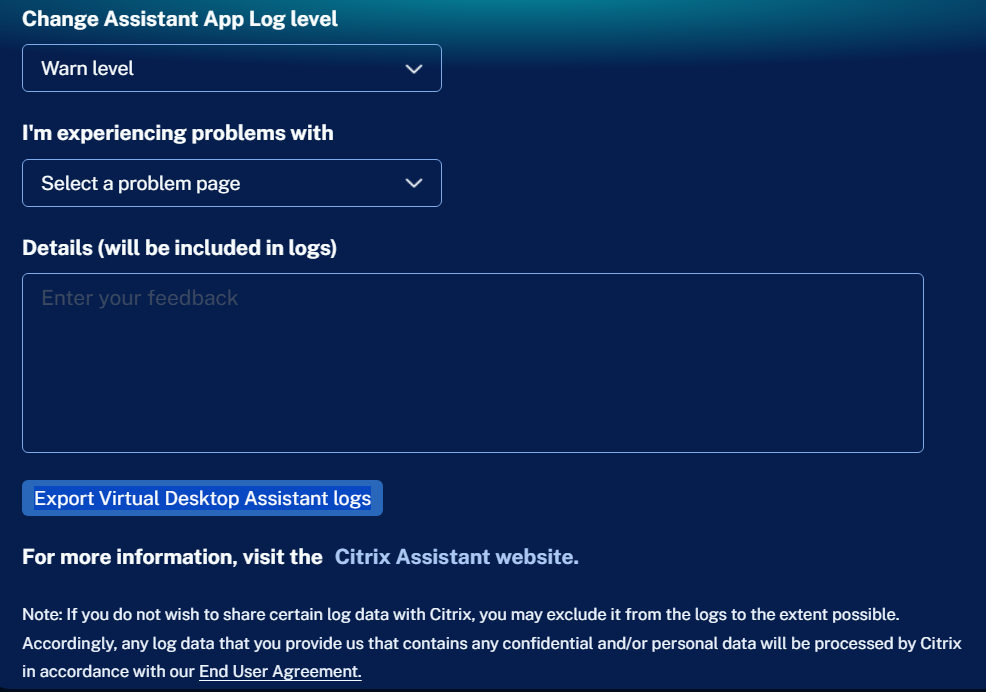
You can also download support files and send feedback along with the Citrix Virtual Desktop Assistant logs.
Limitations
- Temporary file cleanup limitation: The temporary files that are read-only, corrupted, or actively in use, can’t be cleaned.
- Large file rendering time: The Large files section might take a significant amount of time to display files. Efforts are underway to reduce the listing time for these files.
- Recording location limitation: The session recording storage path currently supports only English characters.
Share
Share
This Preview product documentation is Citrix Confidential.
You agree to hold this documentation confidential pursuant to the terms of your Citrix Beta/Tech Preview Agreement.
The development, release and timing of any features or functionality described in the Preview documentation remains at our sole discretion and are subject to change without notice or consultation.
The documentation is for informational purposes only and is not a commitment, promise or legal obligation to deliver any material, code or functionality and should not be relied upon in making Citrix product purchase decisions.
If you do not agree, select I DO NOT AGREE to exit.