Microsoft Entra single sign-on (Preview)
You can leverage single sign-on (SSO) when using Microsoft Entra ID credentials to access virtual applications and desktops on Microsoft Entra hybrid joined session hosts.
For DaaS, see Microsoft Entra single sign-on.
IMPORTANT:
Microsoft Entra single sign-on for Citrix Virtual Apps and Desktops is currently in preview. This feature is provided without support and is not yet recommended for use in production environments.
Supported infrastructure
The following is an overview of the infrastructure components supported for Microsoft Entra single sign-on:
| Machine identity | Citrix DaaS | CVAD On-prem | Citrix Workspace | Citrix Storefront | Citrix Gateway Service | NetScaler Gateway |
|---|---|---|---|---|---|---|
| Microsoft Entra joined | Yes | No | Yes | No | Yes | Yes |
| Microsoft Entra hybrid joined | Yes | Yes | Yes | Yes | Yes | Yes |
Note:
In StoreFront, Microsoft Entra single sign-on is supported with the Modern UI experience only, not with the Classic UI experience.
Supported access methods
The following are the access methods available in a Citrix environment:
- Native access: You use the native Citrix Workspace app client to access Citrix Storefront and establish the session connection.
- Browser access: You access Citrix Storefront through a browser and connect to the virtual app or desktop session using the Citrix Workspace app for HTML5 client.
- Hybrid access: You access Citrix Storefront through a browser and connect to the virtual app or desktop session using the native Workspace app client.
The following is an overview of the access methods supported for Microsoft Entra single sign-on:
| Access Method | Windows | Linux | Mac | Chrome OS | Android | iOS |
|---|---|---|---|---|---|---|
| Native | Yes | Yes | Yes | Yes | Yes | Yes |
| Browser | Yes | Yes | Yes | Yes | Yes | Yes |
| Hybrid | Yes | Yes | Yes | No | No | No |
Note:
You must allow pop-ups for single sign-on to work with browser and hybrid access.
System requirements
The following are the system requirements for using Microsoft Entra single sign-on:
- Control plane: Citrix Virtual Apps and Desktops 2603 or later
- Access Tier: StoreFront 2603 or later
- Virtual Delivery Agent (VDA)
- Windows: version 2507 or later
- Citrix Workspace app
- Windows: version 2508 or later
- Linux: version 2511 or later
- Mac: version 2511 or later
- HTML5: version 2603 or later
- Chrome OS: 2603 or later
- Android: 2511 or later
- iOS: version 2511 or later
- Citrix Web Extension
- Session host OS:
- Windows 11, version 24H2 with 2025-09 Cumulative Updates for Windows 11 (KB5065789) or later installed (build 26100.6725)
- Windows Server 2025 with 2026-01 Cumulative Updates for Windows Server 2025 (KB5073379) or later installed (build 26100.32230)
Note:
The Citrix Web Extension is only needed if your users will be leveraging hybrid access in Windows, Linux, or Mac devices. If your users leverage native or browser access, the Citrix Web Extension is not needed.
Considerations
- If your users will be leveraging hybrid access, they must use either Microsoft Edge or Google Chrome, and install the Citrix Web Extension. Microsoft Entra single sign-on with hybrid access is not supported with other browsers.
- Auto Client Reconnect is not supported when Microsoft Entra single sign-on is used to log into the session. This feature is automatically disabled when this logon method is used. Session Reliability is still available for automatic reconnection in case of network disruptions.
- When a virtual desktop is locked, the default behavior is to display the Windows lock screen. Depending on your authentication requirements, you might need to change the session lock behavior. See Session lock behavior for more details.
- With Microsoft Entra hybrid joined session hosts, single sign-on does not work by default for members of privileged groups such as Domain Admins. To enable it, add the group or user to the Read-Only Domain Controller (RODC) allowlist for Microsoft Entra Kerberos access. See Microsoft Entra Kerberos TGT and Active Directory access control for details.
- Microsoft Entra single sign-on requires the Windows setting Allow Custom SSPs and APs to be loaded into LSASS to be enabled (default). Note that if you deploy the Security Baseline for Windows 10 and later template via Microsoft Intune, this setting is automatically disabled and will block SSO, so you must update your Intune device configuration policy to keep it enabled.
How to configure Microsoft Entra single sign-on
Overview
The configuration of Microsoft Entra single sign-on consists of the following steps:
- Azure and Microsoft Entra ID configuration.
- Register the Citrix resource and client applications.
- Enable the Microsoft Entra ID Remote Desktop Services authentication protocol for the Citrix resource application.
- Hide the user consent prompt.
- Approve the client application.
- Create a Kerberos server object (Microsoft Entra hybrid joined environments only).
- Review Microsoft Entra Conditional Access policies.
- Citrix configuration.
- Provision session hosts with the required OS version, identity type, and VDA version.
- Configure StoreFront.
- Enable Microsoft Entra single sign-on in your site.
- Enable Microsoft Entra single sign-on in your delivery groups.
Azure and Microsoft Entra ID configuration
In order to leverage Microsoft Entra single sign-on, you must first allow Microsoft Entra authentication for Windows in your Microsoft Entra ID tenant, which enables issuing the required authentication tokens that allow users to sign in to the Microsoft Entra joined and Microsoft Entra hybrid joined session hosts.
The person making the Azure configuration must be assigned one of the following Microsoft Entra built-in roles or equivalent at a minimum:
The configuration can be completed through Azure Portal, using Microsoft Graph PowerShell SDK, or Microsoft Graph API. The following sections provide details for completing the configuration through Azure Portal. If you prefer to use Microsoft Graph PowerShell SDK or Microsoft Graph API, refer to Microsoft Entra single sign-on Azure configuration.
Register Citrix applications
You must register the multi-tenant Citrix Resource application in your Azure tenant and create a single-tenant Client application.
First, you must register the Citrix Resource application. To do so, use one of the following consent URLs:
- US, EU, APS:
https://login.microsoftonline.com/common/adminconsent?client_id=3a510bb1-e334-4298-831e-3eac97f8b26c - Japan:
https://login.microsoftonline.com/common/adminconsent?client_id=0027603f-364b-40f2-98be-8ca4bb79bf8b
Once the Resource application is registered, you need to create your single-tenant Client application.
Create a single-tenant Client application
- Go to the Azure Portal.
- Navigate to Microsoft Entra ID > Enterprise Applications.
- Select New application.
- Select Create your own application.
- Enter a name for the application, select Register an application to integrate with Microsoft Entra ID, and click Create.
- Under Supported account types, select Single tenant only, and click Register.
- Navigate to Microsoft Entra ID > App registrations, and select All applications.
- Search for and click on the application you just created.
- Click on Add a Redirect URI.
- You will need to add three redirect URIs: Web, Single-page application, and Mobile and desktop applications.
- For each URI, select Add Redirect URI.
-
Enter the Redirect URI. Refer to the table below for details on what to add.
Platform type Redirect URI Notes Web NetScaler login URI ( https://<URL>/oauth/login)Enter your NetScaler authentication URL. For example, https://nsg.mycitrix.com/oauth/login.Mobile and Desktop Applications ctxaadsso://citrix.aad.redirectEnter this URI exactly as is. SPA App (Single Page Application) NetScaler Gateway URL followed by StoreFront Store Web path Enter your NetScaler Gateway URL + StoreFront Store’s path. For example, if the URL used to access your Store is https://access.mycitrix.com/Citrix/MyStoreWeband your NetScaler Gateway URL ishttps://nsg.mycitrix.com, the SPA Redirect URI must behttps://nsg.mycitrix.com/Citrix/MyStoreWeb. If you have multiple Stores in your environment, you must add SPA Redirect URI entries for every store. - Select Configure.
- After all Redirect URIs have been added, you will need to add an API permission to the Client application.
- Select API permissions on the left pane under Manage.
- Select Add permission.
- Select APIs my organization uses.
- Select the Citrix Resource application (Citrix-Workspace-Resource).
- In the list of permissions, check user_impersonation.
- Select Add permissions.
- Select Overview on the left pane and take note of the assigned Application ID.
Register the Client application
Once the application has been created and configured, you must consent to the application permissions.
You can consent to the application’s permission within Azure portal:
- Navigate to Microsoft Entra ID > Enterprise Applications.
- Search for and select the Client application.
- Select Permissions on the left pane under Security.
- Click on Grant admin consent for <tenantName>
- Consent to the permissions.
Alternatively, you can use an admin consent URL: https://login.microsoftonline.com/<EntraTenantID>/adminconsent?client_id=<clientAppID>
NOTE:
You must replace
<EntraTenantID>with your Entra tenant’s ID, and<clientAppID>with the Client application’s Application ID.
Citrix Resource application permissions
The following are the application’s permissions:
| API name | Claim value | Permission | Type |
|---|---|---|---|
| Microsoft Graph | User.Read | Sign in and read user profile | Delegated |
For US, EU, and APS, the application is called Citrix-Workspace-Resource (application ID 3a510bb1-e334-4298-831e-3eac97f8b26c).
For Japan, the application is called Citrix-Workspace-Resource-JP (application ID 0027603f-364b-40f2-98be-8ca4bb79bf8b).
Citrix Client application permissions
The following are the application’s permissions:
| API name | Claim value | Permission | Type |
|---|---|---|---|
| Citrix-Workspace-Resource
Citrix-Workspace-Resource-JP |
user_impersonation
|
Citrix Entra ID SSO
|
Delegated
|
| Microsoft Graph | User.Read | Sign in and read user profile | Delegated |
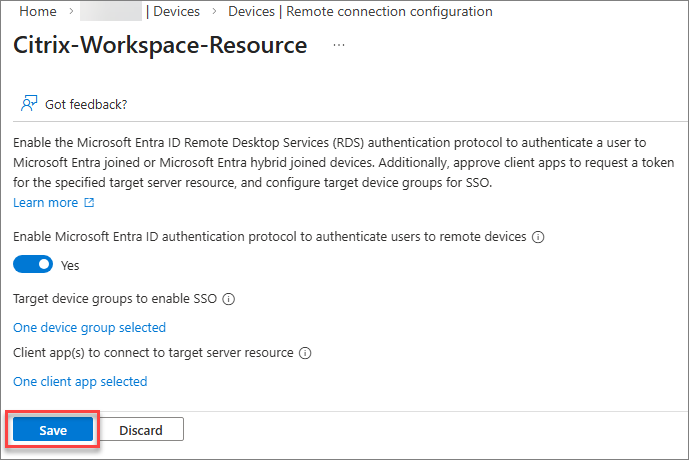
Enable Microsoft Entra ID Remote Desktop Services authentication protocol
You must enable the Microsoft Entra ID Remote Desktop Services authentication protocol in the Citrix Resource application. To do so:
-
In Azure Portal, navigate to
Microsoft Entra ID>Devices>Manage>Remote connection configuration.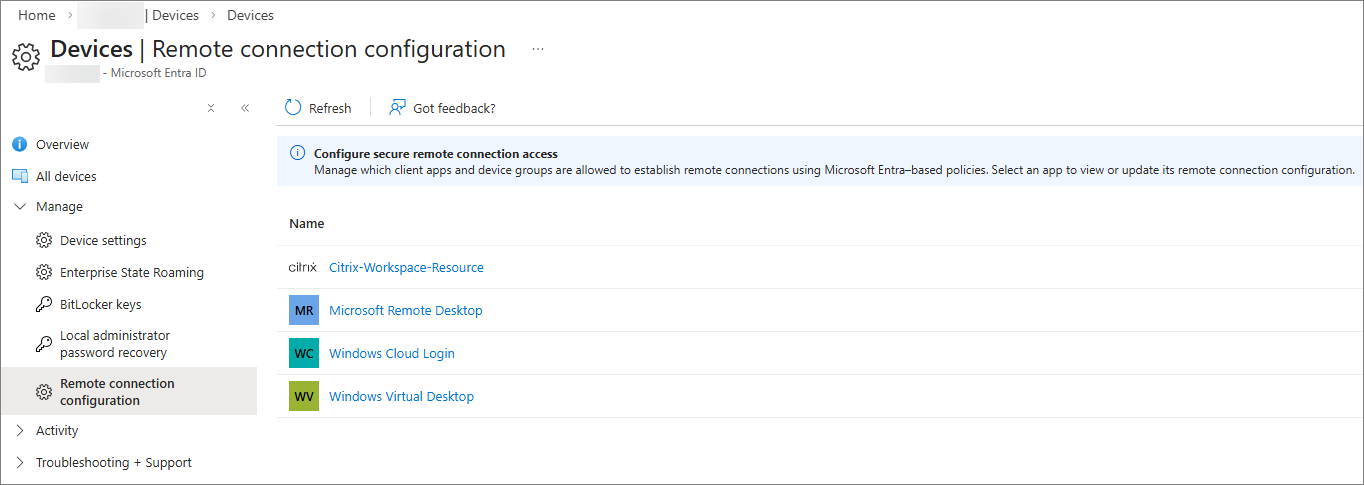
-
Select Citrix-Workspace-Resource.
-
Enable Microsoft Entra ID Remote Desktop Services authentication protocol.
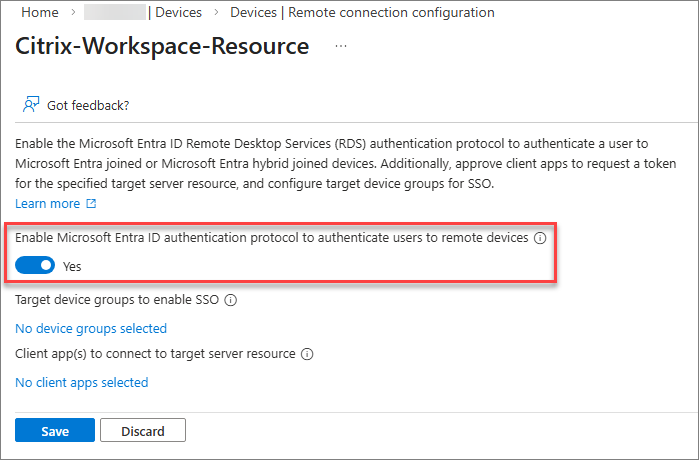
-
Proceed to hide the user consent prompt.
Hide the user consent prompt dialog
By default, users are prompted to allow the Remote Desktop connection when connecting to a Microsoft Entra joined or Microsoft Entra hybrid joined session host with Microsoft Entra single sign-on enabled, in which they must select Yes to allow single sign-on. Microsoft Entra will remember up to 15 unique session hosts for 30 days before prompting again.
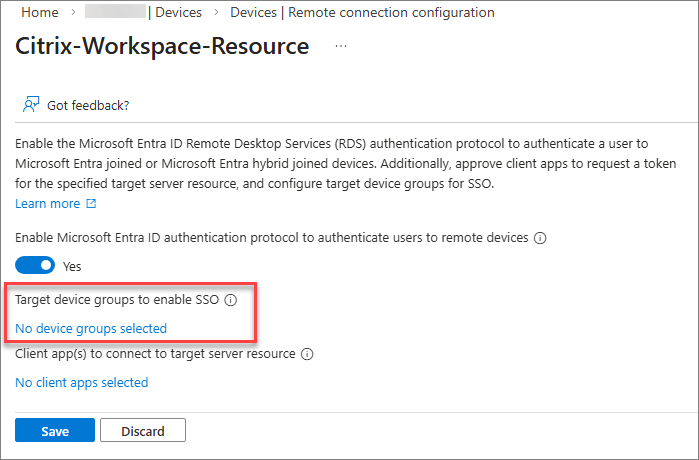
You can hide this dialog by configuring a list of target devices. To configure the list of devices, you must create one or more groups in Microsoft Entra ID that contain the Microsoft Entra joined and/or Microsoft Entra hybrid joined session hosts and then authorize the groups in the resource application, up to a maximum of 10 groups.
Once you have enabled the Microsoft Entra ID Remote Desktop Services authentication protocol and the groups have been created:
-
Click on the link to add the target device groups and select the appropriate groups.
NOTE
It is highly recommended to create a dynamic group to simplify the membership management for the group. While dynamic groups normally update within 5-10 minutes, large tenants can take up to 24 hours.
Dynamic groups requires the Microsoft Entra ID P1 license or Intune for Education license. For more information, see Dynamic membership rules for groups.
- Proceed to approve the client application.
Approve the client application
You must explicitly add the Citrix Client application as an approved client in the Citrix Resource application:
-
Click on the link to add your trusted client applications.
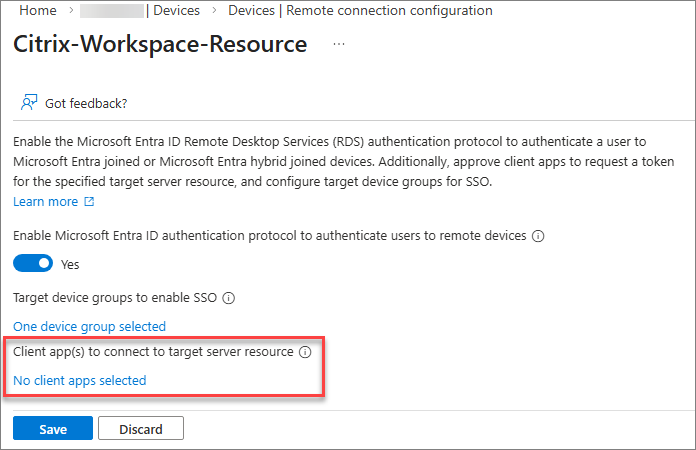
-
Select the Citrix Client application.
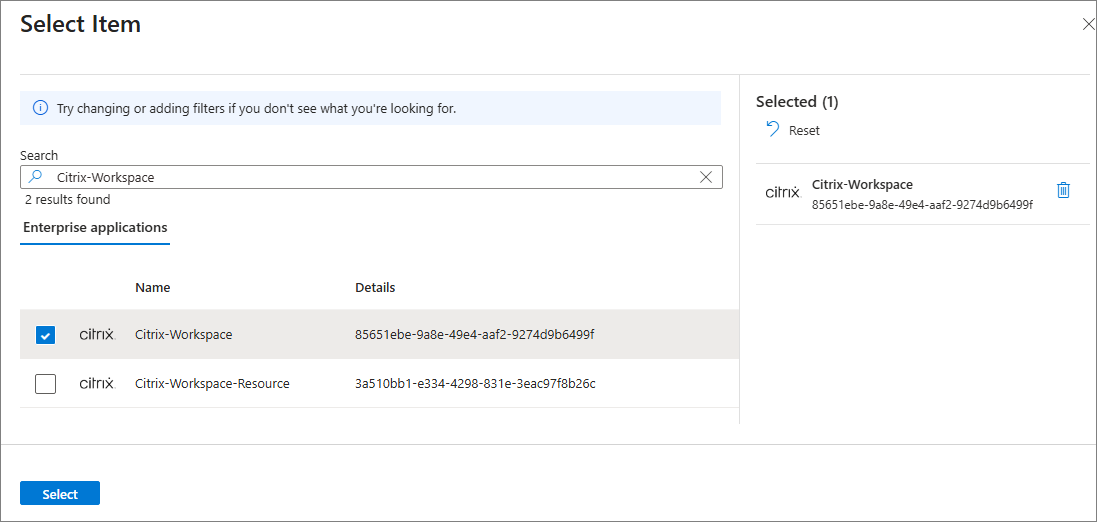
-
Select Save to apply the configuration changes to the Citrix Resource application.
-
Proceed to create a Kerberos server object.
Create a Kerberos server object
If your session hosts are Microsoft Entra hybrid joined, you must configure a Kerberos server object in the Active Directory domain where the user and computer accounts reside. See Create a Kerberos Server object for details.
Review Microsoft Entra Conditional Access policies
If you use or plan to use Microsoft Entra Conditional Access policies, review the configuration applied to the Citrix Resource application to ensure users have the intended sign‑in experience.
For detailed guidance on configuring Conditional Access when using Microsoft Entra single sign‑on for DaaS, refer to the Microsoft documentation. Remember that the required Conditional Access settings must be applied to the Citrix Resource application, not the Microsoft applications.
Citrix configuration
Citrix Session Hosts
Ensure the system requirements for the session hosts are met:
- Ensure the session hosts are Microsoft Entra hybrid joined.
- Install the required operating system version and build as specified in the system requirements.
- Install the required VDA version as specified in the system requirements.
Microsoft Entra hybrid joined session hosts
When deploying Microsoft Entra hybrid joined session hosts with Citrix Machines Creation Services, Citrix Provisioning, or Windows 365, proceed to the next section. If you are provisioning Microsoft Entra hybrid joined hosts using any other tool or method, you must add the following registry value to your session hosts:
- Key:
HKLM\SYSTEM\CurrentControlSet\Control\Citrix - Value type: DWORD
- Value name:
AzureADJoinType - Data:
1
Session lock behavior
When a virtual desktop is locked, the default behavior is to display the Windows lock screen. At this point, the supported authentication methods for unlocking the desktop are username and password or smart card.
If you have a passwordless deployment where users don’t know their passwords, it’s recommended to configure the session lock behavior to disconnect the session instead of showing the lock screen.
You can configure this behavior by enabling the Disconnect remote session on lock for Microsoft identity platform authentication setting through Intune or Group Policy. For detailed steps, see Configure the session lock behavior for Azure Virtual Desktop.
Citrix Access and Control Plane
StoreFront configuration
To enable Microsoft Entra single sign-on with StoreFront, please refer to Entra ID single-on in the StoreFront documentation.
Enable Microsoft Entra single sign-on in Web Studio
To enable Microsoft Entra single sign-on on your site, you must add your Client and Resource application details and Redirect URI. Refer to the Settings documentation for details.
Enabling Microsoft Entra single sign-on for delivery group
Using Web Studio
- Go to delivery groups on Web Studio and click Create Delivery Group.
- On the Users page, select Microsoft Entra hybrid joined as the identity type.
- Complete the configuration on the following pages. For reference, see Create delivery groups.
Using PowerShell
- Create a new delivery group and add the VDA to the delivery group. Assign the user (AD account) to the VDA.
-
Set the delivery group
MachineLogonTypetoHybridAzureAd. For example:Get-BrokerDesktopGroup -Name <dgName> | Set-BrokerDesktopGroup -MachineLogOnType "HybridAzureAd" <!--NeedCopy--> -
Trust the Xml Service.
Add-PSSnapin Citrix.Broker.Admin.V2 Set-BrokerSite -TrustRequestsSentToTheXmlServicePort $true <!--NeedCopy--> -
Set the SSO parameters (see table below for guidance).
Set-BrokerSite -AzureGlobalCloudId "B16898C6-A148-4967-9171-64D755DA8520" -AzureSSOnAuthorizeUrl "<URL>" -AzureSSOnClientId "<clientAppID>" -AzureSSOnRedirectUrl "<URL>" -AzureSSOnResourceAppId "<resourceAppID>"
<!--NeedCopy-->
The following table provides details of the parameters and their default values:
Parameter Default value Description AzureGlobalCloudId B16898C6-A148-4967-9171-64D755DA8520 Default GUID for the Windows Web Account Manager used for Entra authentication. AzureSSOnAuthorizeUrl https://login.microsoftonline.com/common/Initial login URL. This is determined by which Azure cloud the Entra tenant is in (e.g. Azure Commercial vs. Azure Gov) AzureSSOnClientId No default Application ID of the Client application. AzureSSOnRedirectUrl No default Post-authentication redirect URI. It must be a URL that is configured as a redirect URI in the client application. AzureSSOnResourceAppId
citrix.cloud.com/<resourceApplicationID>
Application ID of the Citrix Resource application.
- US, EU, APS: citrix.cloud.com/3a510bb1-e334-4298-831e-3eac97f8b26c
- Japan: citrix.cloud.com/0027603f-364b-40f2-98be-8ca4bb79bf8b
- US, EU, APS: citrix.cloud.com/3a510bb1-e334-4298-831e-3eac97f8b26c
Client Device
Ensure the system requirements for the client devices are met:
- Install the required Citrix Workspace app version as specified in the system requirements.
- If your users will be leveraging hybrid access, make sure the Citrix Web Extension is installed. If your users will be using native or browser access, the Citrix Web Extension is not needed.
Troubleshooting
- For troubleshooting StoreFront issues, see Diagnostics logs.
- If you’re getting the following error from storefront:
There was a failure with the mapped account: That’s probably a pure Entra user, without a synced/backing AD account. - On launch there is an immediate error before getting an Ica file: Make sure you enabled trusting the Xml Service.
- If the VDA get’s stuck at Initializing during registration: Make sure the VDA has been moved to an OU that is actually Entra synced.
When single sign-on fails
If single sign-on fails when accessing virtual desktops or applications, proceed as follows:
-
Confirm that Microsoft Entra single sign-on is enabled in StoreFront.
-
Confirm that Microsoft Entra single sign-on is enabled in your site.
-
Confirm that Microsoft Entra single sign-on is enabled in the delivery groups.
-
Confirm that the access method leveraged by the user is supported.
-
If the user is leveraging hybrid access, confirm that the Citrix Web Extension is installed.
-
Confirm that the client device is running the required Citrix Workspace app version.
-
Confirm that your session hosts are running the required Windows build.
-
Confirm that your session hosts are running the required VDA version.
-
Ensure that the Windows setting
Always prompt for password upon connectionis not enabled on the session hosts. This setting is disabled by default, and can be configured through Group Policy or Intune underComputer Configuration\Administrative Templates\Windows Components\Remote Desktop Services\Remote Desktop Session Host\Security. You can check in the registry if the setting is enabled by looking for the valuefPromptForPasswordunderHKLM\SOFTWARE\Policies\Microsoft\Windows NT\Terminal Services. If the value is set to1, the setting is enabled and single sign-on will not be available. If the value is missing or set to0, the setting is disabled. -
Ensure that the Windows setting
Allow Custom SSPs and APs to be loaded into LSASSis enabled on the session hosts. This setting is enabled by default, and can be configured through Group Policy or Intune underComputer Configuration\System\Local Security Authority. - Confirm that the
AzureADJoinTypesetting is configured correctly in the session hosts:- Key:
HKLM\SYSTEM\CurrentControlSet\Control\Citrix - Value type: DWORD
- Value name:
AzureADJoinType - Value data:
1(Microsoft Entra hybrid joined)
- Key:
-
Ensure that the virtual desktops or applications are assigned to Active Directory identities and not Entra ID identities in Citrix Studio.
-
Confirm that the Delivery Groups’ logon type is configured correctly by running the following PowerShell command:
Get-BrokerDesktopGroup -Name <deliveryGroupName>
<!--NeedCopy-->
For Microsoft Entra hybrid joined session hosts,
MachineLogOnTypemust be set toHybridAzureAd. -
Confirm that the Citrix Resource application and the single tenant Client application are registered in the Microsoft Entra tenant.
-
Confirm that the Microsoft Entra ID RDS authentication protocol is enabled on the Citrix Resource application.
-
Confirm that the Client application was added as an approved client application in the Citrix Resource application.
-
If your session hosts are Microsoft Entra hybrid joined, confirm that a Kerberos server object was created in the Active Directory domain where the user and computer accounts reside.
- Review your Microsoft Entra Conditional Access policies. Ensure no policies are being applied to the Citrix Resource and Client applications or the session hosts that would affect the single sign-on experience.